Ever since I posted my Halloween photos on Facebook, a lot of my friends had asked me where I got the idea of making the Minion costume. Well, to be honest, I didn’t plan to be a Minion until two days before Halloween.
My original plan (if this is what you call a plan) was to get whatever I could fit in from a store and claim it my Halloween Costume of 2014. A drive to Walmart and Target gave me a witch costume and a witch hat. All I needed was a witch broom and I would be all set for my first ever Halloween party at work. It never occurred to me that it could be such a pain to find a broom! A visit to another Walmart didn’t solve my problem and how Party City carried a variety of witch costumes but not a single broom (or not having enough brooms in stock?) was beyond me. My mother suggested to buy a real broom but the selections I found in the retail stores looked too modern to me (and by the way who would want to carry a real broom to work?!). Apparently it wasn’t as easy as I thought to complete a costume of an ordinary, classic witch these days.
While I kept searching for a broom (or pondering whether I should make my own), I started to look at the alternatives. My younger sister is a fan of DIY costumes but she was far away in college, probably busy making her own. I like to be creative but when it comes to costume, I just lack the talent. So the search dragged on until I came across a Halloween throwback photo from my high school classmate on Facebook two days before the big day.
I immediately fell in love with the idea of being a Minion on Halloween!!
A quick Google search further reinforced my determination to be this cute character. I was grateful that there was a rich resource of DIY Minion costume readily available on the Internet. Of course, I was well aware of the fact that the first Despicable Me had already been out for four years but I was confident that none of my coworkers had ever worn a Minion costume at work in the past Halloweens–at least I didn’t see anyone wore one in the photos they took in the last four years when I hadn’t joined the organization.
As a token of my appreciation to the people who shared their DIY Minion costumes on the Internet (BIG thanks to you guys for inspirations) and my friends who LIKE and/or inquired about my creation, I will demonstrate how my Minion costume was made in one evening.
Materials: Overall (I bought mine in the men’s section at Walmart because I couldn’t fit into any of the junior sizes and the women’s section didn’t offer overall), a yellow long sleeve shirt, staples, book strap, two Ball Mason jar lids, tape, a stripe of aluminum foil, a pair of yellow socks, cure pipe, black shoes, black gloves
Instructions:
Instead of cutting and sewing black felt onto the front pocket to make the Minion logo or ironing on a premade one, I opted for a simple paper version fixed with tapes. First, I Google searched “jeans close up” and found a blue background that matched the color and pattern (as closely as possible) of my overall. Then, I searched for the Minion logo, enlarged it and printed it (the black part as shown in the following images). I darkened the logo with a black marker to increase the contrast. I then cut out the logo and glued it to the blue background.
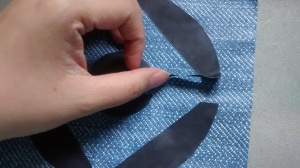
Tape the logo onto a blue paper/printout
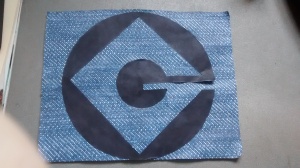
Minion logo

Tape the logo to the front pocket
Staple the corners of the logo
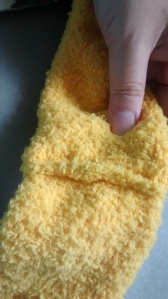
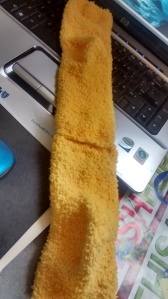
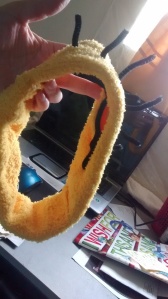
It took me a while to figure out how to make the head accessory. My original thought was to buy a beanie. Unfortunately, I couldn’t find a yellow beanie in any of the stores (Walmart, Target, Dollar Tree, Dollar General, K-mart, Sears, etc.). I also didn’t have any luck in finding a yellow headband. During my trip to Dollar Tree, I saw that they were selling winter socks and there were a few yellow pairs that seemed to fit my need. Since I only had one evening to make the costume, the pair of yellow socks was my best option. All I had to do was sew the ends of the socks together to form a headband and then poked some cure pipes through the socks to make the hair.
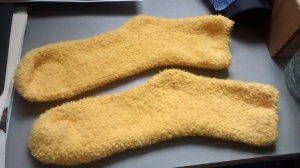
Winter socks
Sew the ends together to form a headband
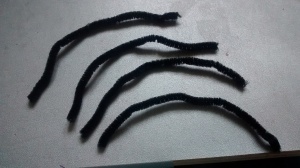
Cut a cure pipe into four pieces
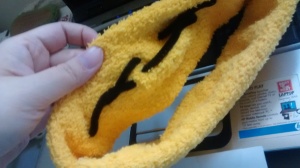
Stick the cure pipes through the socks/headband

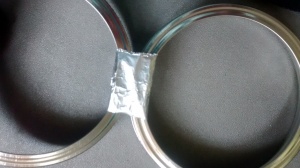
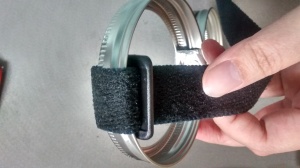
In my opinion, the goggles were the most interesting part. I took two Ball Mason jar lids (the center part could be separated) and taped them together. I then used a thin strip of aluminum foil to cover the tape. Then I tied a book strap to the goggles. The good thing about the book strap I bought from Walmart was that it had velcro so I could adjust the length.
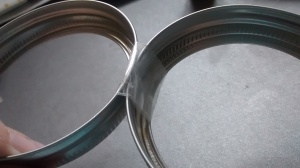
Tape the lids together
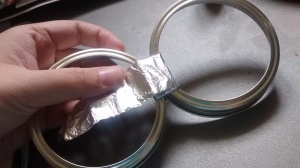
Wrap a piece of aluminum foil to cover the tape
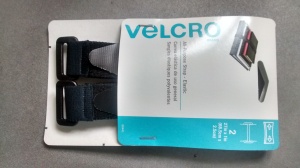
Book straps from Walmart.
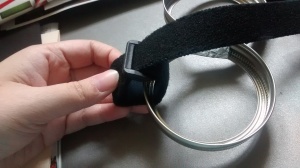
Tie a book strap to the lid
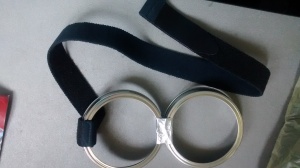
Finished goggles
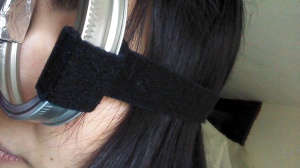
Velcro allows length adjustment
The last step, of course, was to try on my DIY Minion costume and wear it to work on Halloween!
I had a good time at work on Halloween. It was my very first time going in to work dressed in Halloween costume. Of course I didn’t wear the headband and the goggles when I drove to work…in case I got pulled over…LOL.


 At the age of 24, unmarried, and without child, it never occurred to me that I would read a parenting book. Yet, when a tremendous amount of media attention was paid to Battle Hymn of the Tiger Mother, a parenting book by Amy Chau, my curiosity started to itch. My mother, who was desperate to show my siblings and me her (what she thought) less-restricted-than-other-Chinese-parents parenting, nagged me to read the book. I picked it up at the local library and spent the following days on and off on the “story of how Chinese parents are better at raising kids than Western ones.”


